Using Front Page
to Create and Connect an Active Server Page
to an Access Database
An "active server page" allows web users to input information and for you to collect that information in a database. Uses vary for an active server page (asp). Some include developing a guestbook, taking a survey, or registering for an activity on the web. For example, the Business Department uses an asp to register contestants for Business Competition Day.
Planning your Assignment
These instructions detail how to create an asp for you own website. Your assignment is to develop an asp for your site. It is your choice to decide what you want the page to do. You do need to plan whether this is a guestbook or a survey. Whichever it is, be sure to include the following form elements:
- a one line textbox
- a pull down menu.
- a scroll box
- a set of radio buttons.
- a check box or a group of check boxes
- three or more form elements of your choice
Now would be a good time to think what type of page you want to develop. Personally, I have always thought it would be interesting to develop a database of favorite move quotes or a list of murder mystery book recommendations.
For this assignment, we are going to let FrontPage create the database from the information we are putting into the form. Sometimes, you will need to create the database yourself, but for today let FrontPage do this part.
Getting Started
A FrontPage asp must be placed on a Microsoft server that is running FrontPage extensions. So you will need to create this project in your folder on the web partition of triton3. To find out if this project would work, I created a folder for myself on triton3 at the same level that you will be working.
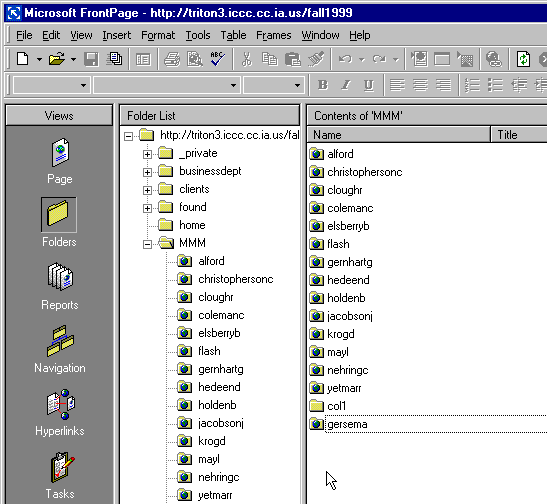
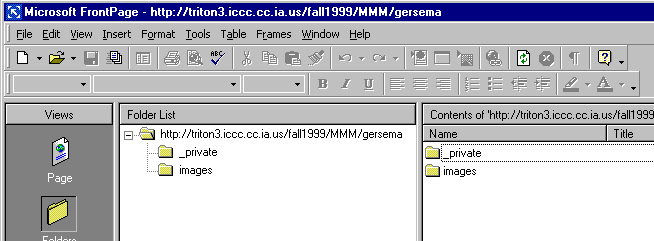
Here is the inside of the gersema folder with no other files yet involved.
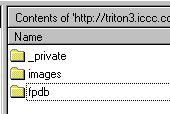
Create an fpdb Folder
The first requirement is to create a folder labelled fpdb in your web folder. You just create this folder in the usual way.
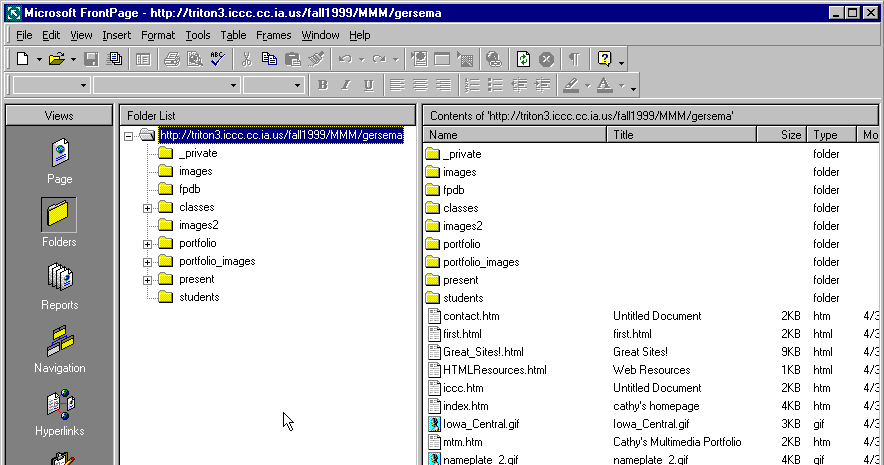
Since I wanted to create a more realistic site (i.e., more than just one page!), I copied one of my other sites into this folder.
Create a Link
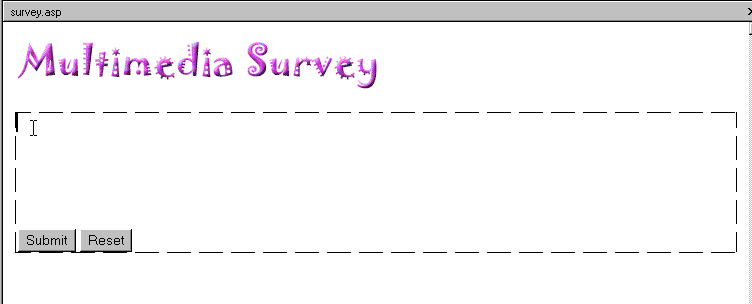
Next, I added a link inviting people to take my web design survey on my splash page to soon to be created survey page. Since the survey will be placed on an active server page, I titled the link: survey.asp
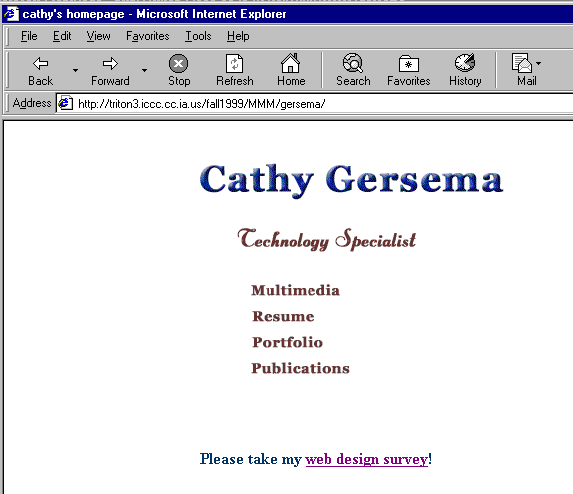
(Note: when you get to the web design survey page, you will probably notice that it does not survey web design at all. Well, whose fault is that?)
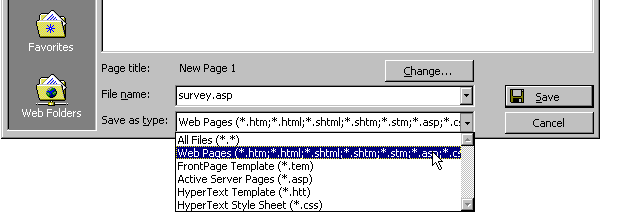
Creating an .asp Page
Now that you have a link to the page, you need to create a new page and save it as an .asp not as an html page. You must do this in FrontPage. First, create the page. Second, save it with the extension .asp instead of .htm. Be sure you save it at the same level as your index.htm or default.htm page.
When you return to FrontPage, you can create the survey page.
To do this, I included a graphic that tells this is a suvery.
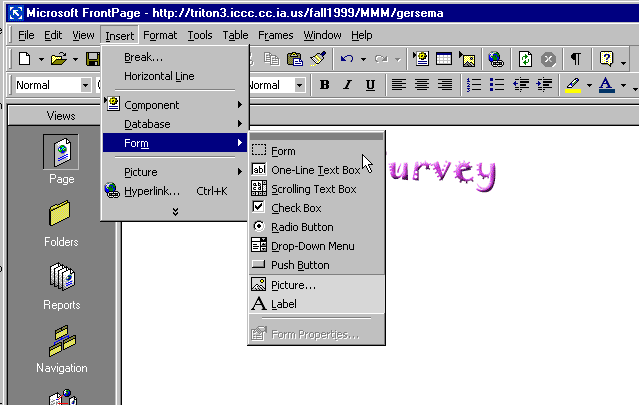
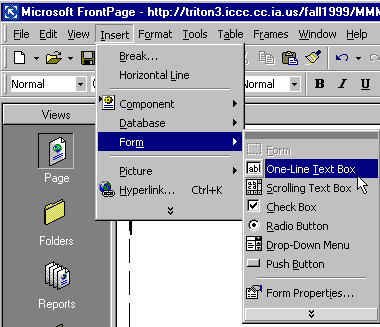
Inserting a Form
Next, you need to insert a form. To do this, select form from insert menu.
Now my page looks like the one in the following picture but it has the form element outlined in dotted lines.
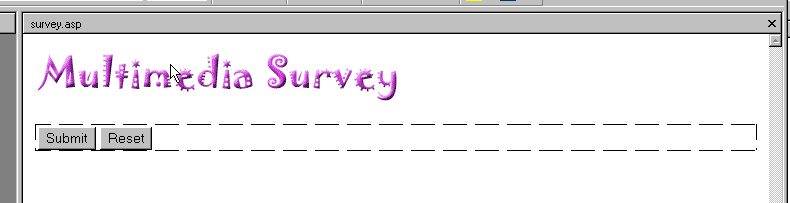
In order to get some working room, place the cursor in front of the submit button and press return four or five times.
The next thing to do is to add a form element. In the example below, I added a one-line text box from the form submenu of the insert menu.
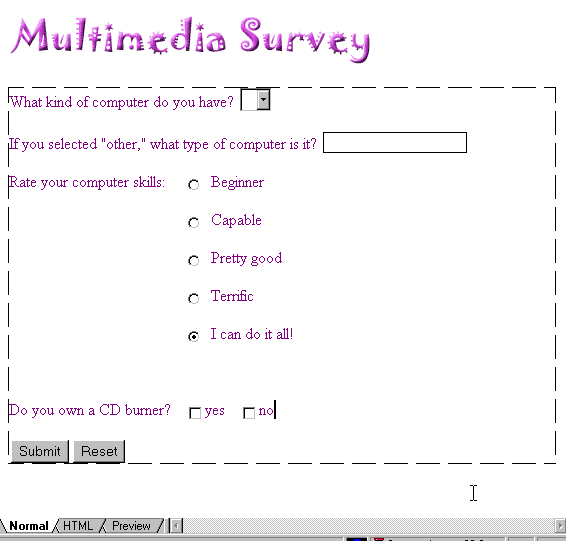
Since you will need to add several types of form elements, this would be a good time to add some of them. Below I have added a drop down menu, a one line text box, radio buttons, and check boxes.
Editing Form Elements
The form elements need to be edited. To do this, double-click on the element you need to change. Here are the directions for editing specific elements.
Editing a Drop Down Menu
- Double click in any part of the form element rectangle.
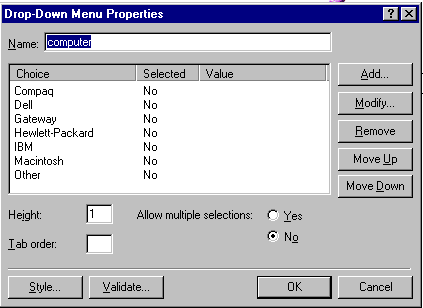
- When the form dialog box opens, give the drop down menu the name that you want to call this field in your database. In the example above, I want to know the brand of computer so I called the form element "computer."
- If you more than one word to define the form field, make sure you use underscores between the words. Click on add to make the list of items that belong in the menu.
- Once you have added all the items, select OK.
When you return to the page, the drop down menu should look like this.

If you need to do further editing, double click on the drop-down rectangle again.
Editing a One Line Text Box
To edit the text box, double click on it.
![]()
When the text box dialog menu opens, give the text box the name that you want to use as a form field in the database. You can change the width of the text box at this point too.
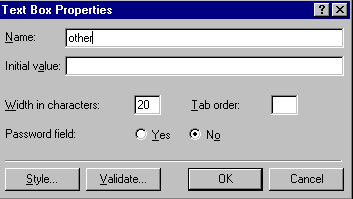
Unless you are planning to add a password or to validate the field, you are done at this point. Click OK and go on with your form.
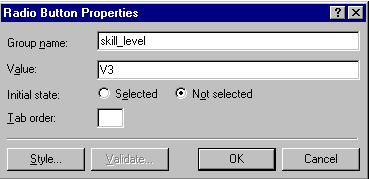
Editing Radio Buttons and Check Boxes
Radio buttons and check boxes can be edited in the same way.
To edit them, follow these steps:
- Double click on the check box you want to edit.

- In the dialog box, give the button or box a name. If you are using more than one button or box, you must give all of the boxes in that group the same name.
- If you want to require that one button should be the default button, click selected.
- Click OK.
Linking the Form to the Database
The next step is to link the form to the database. When you added all the form fields that you want in the database, right click inside the form area and select form properties.

When the form properties dialog box opens, select send to database. This is a good time to name your form.
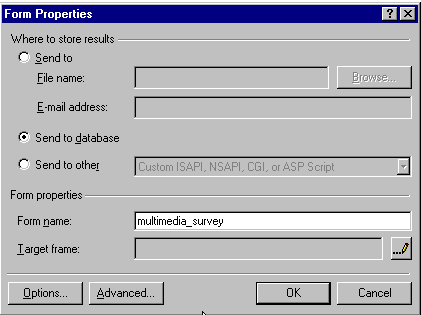
When you click OK, the following dialog box appears.
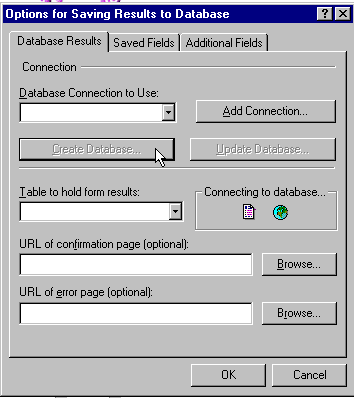
Since we are having FrontPage make the database, click on create database.
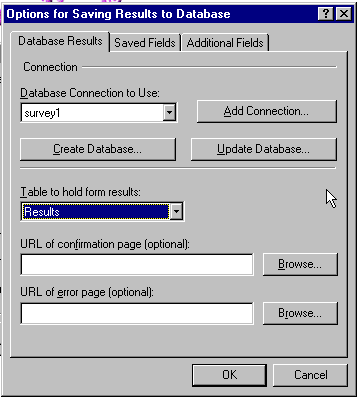
FrontPage will suggest placing into a table the information collected from the survey page. Great idea. More work for FrontPage, less for you. To see how your fields will match up with the database that FrontPage is about to create, click on saved fields.
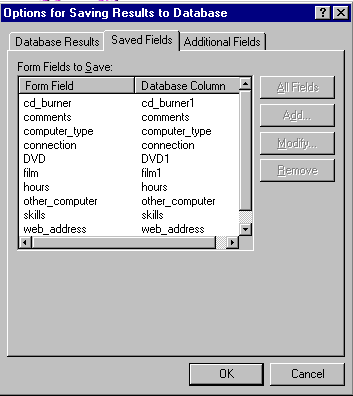
One huge advantage in having FrontPage create the database is that the fields will be sure to match. FrontPage will also create the key field as an autosum so you do not have to worry about that either. (Again, make sure you do not use spaces in the field titles!)
FrontPage will create both the confirmation and the error page. So unless you want to create your own, skip this part.
If you click on the additional fields tab, you will find that FrontPage will add
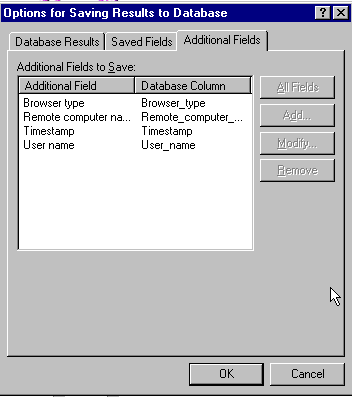
If you don't want these fields, you can delete them now or later when you work with the database.
When you see the confirmation dialog box, you know that database has been created and that it has been placed in your fpdb folder.

Creating a Results Page
Wouldn't it be nice to see the information in the survey or guestbook page from anywhere on the web? You can do this by creating a results page, which is also an asp page.
Start a new page in FrontPage.
From the insert menu, select database and then follow the arrow over to results.
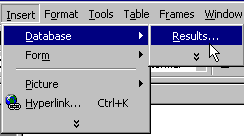
FrontPage then uses a database results wizard to help you create this page.
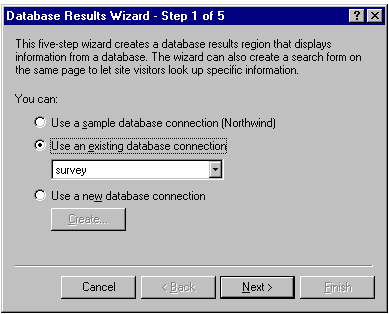
Use the drop down menu to select the database you want to use for the results page.
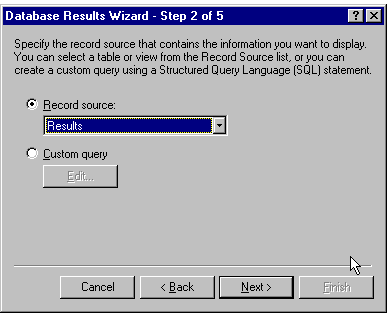
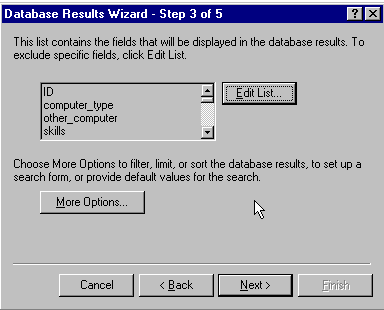
Next, you can edit the fields to be viewed to the results page. Click next.
Step 4 lets you decide whether you want to use one page for each report or to view the results as a list. Using the drop down menu, I chose to view mine as a list.
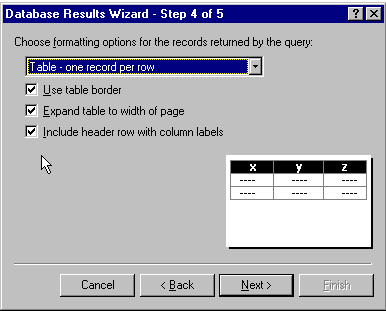
I like to see all records together, so I chose that option.
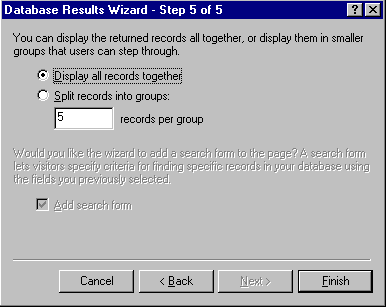
After you click finish, you need to save this page as results.asp or some name you will remember. The page will only work if you use .asp as the extension. Be sure and save this page in the same folder that your first asp is saved in.
Testing the Pages
To find out if your active server pages work, you need to go to the Internet and fill in a sample of the information you are collecting. If the page works, you will receive a confirmation. If not, you will get an error message. (Let's hope you don't get any error messages or you will have to figure out where you went wrong.)
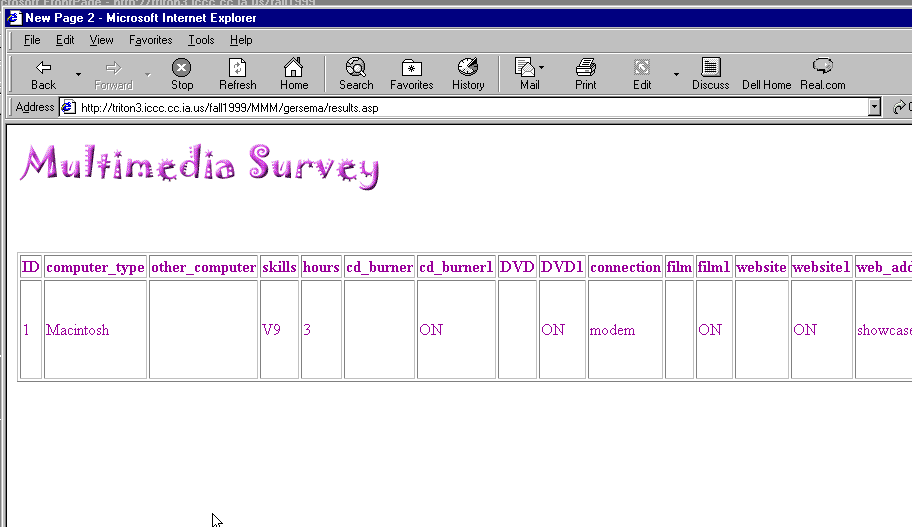
Go to your website on Triton3 and take your survey. If you receive a confirmation, call up your results page. It will contain table of results like the page below holds.
Working with the Database
To work with the database, you will need to access it through FrontPage. Then open the fpdb folder and double click on your database. The database will launch and you are in business. (Note: you must have both FrontPage and Access on the computer you are working at for this to work.)
Here you have all the information you need to create active server pages using FrontPage and Access.